Physical Address
304 North Cardinal St.
Dorchester Center, MA 02124
Physical Address
304 North Cardinal St.
Dorchester Center, MA 02124

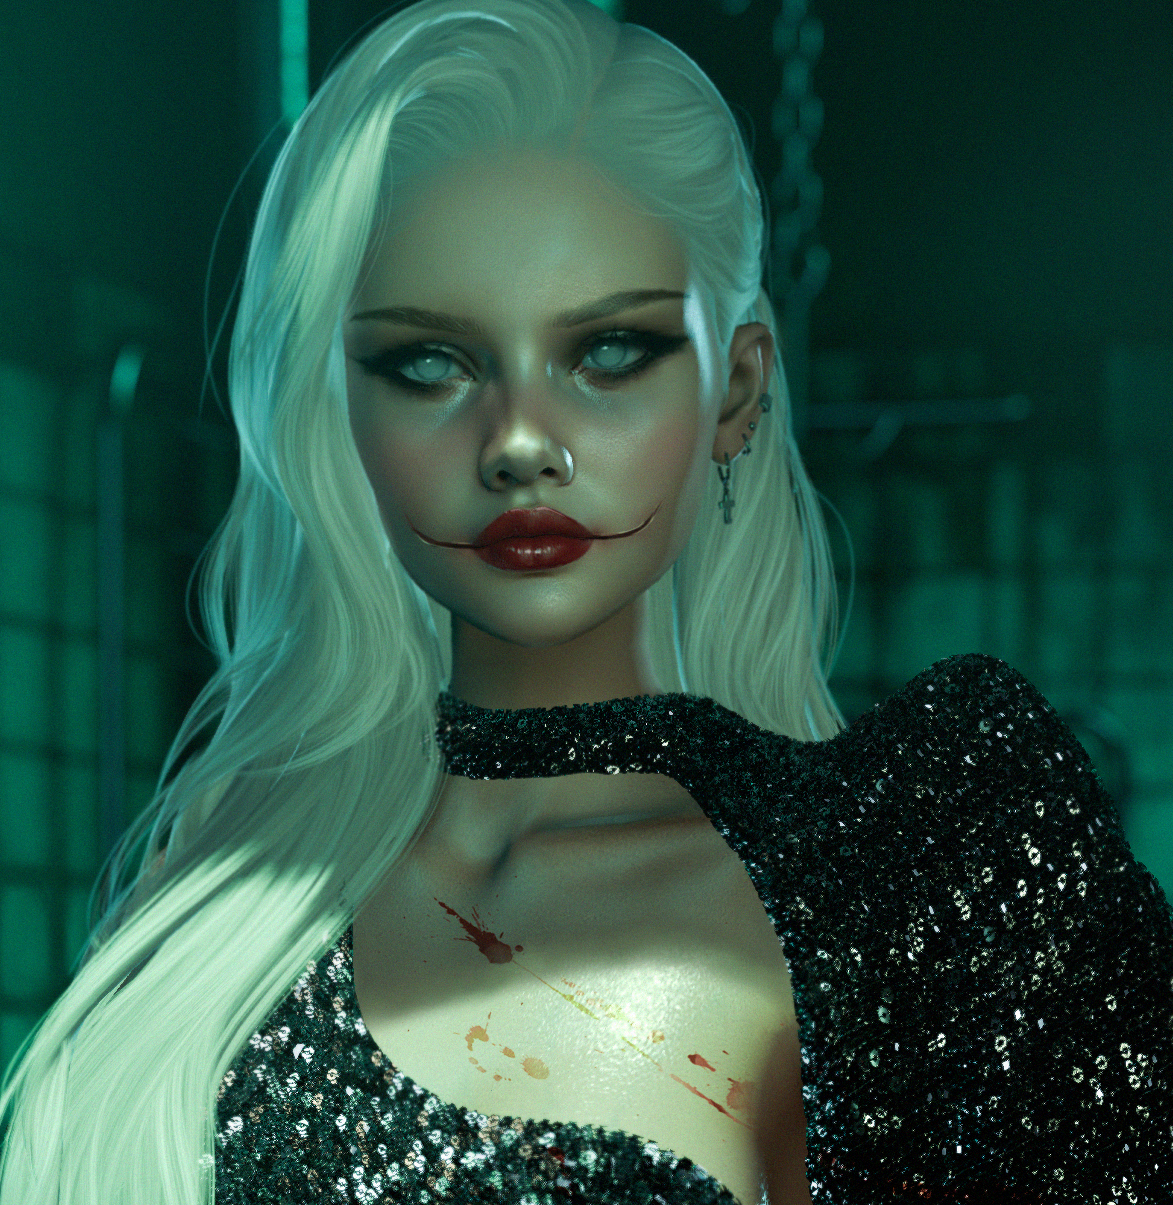
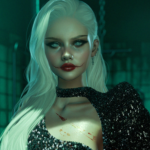
A step-by-step tutorial of how I made my artwork Get Vicious with Second Life photography and Photoshop.
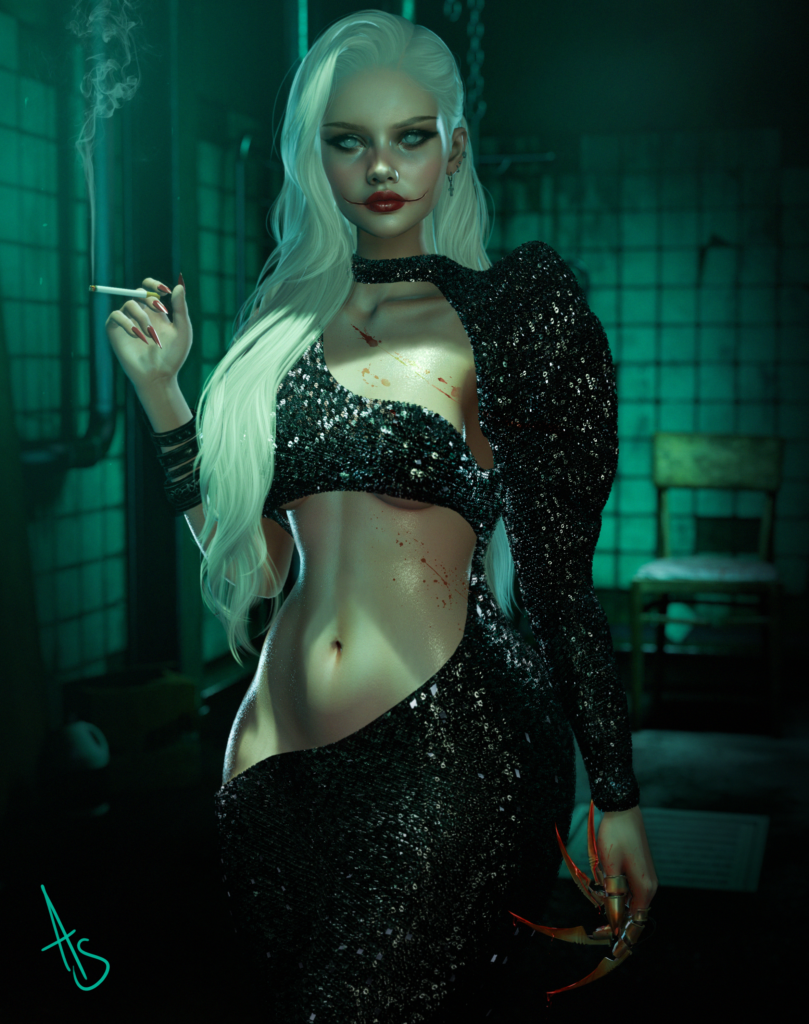
This post will be a step-by-step tutorial for one of my most recent images, “Get Vicious”. It required a lot of editing and painting within Photoshop to achieve the final result I was aiming for: a glamorous, powerful woman with a sinister, dark side 😈
Let’s Go!
Step 1.
Whilst in Second Life, I set up a photoshoot using a background named “Back Room” by VARONIS and spent some time designing a character I felt fitted the theme. It then took time and patience to decide on the pose and correct lighting direction within the scene. I wanted a very dark and grungy feel to the shot.
Admittedly, I was in a rush when this screenshot was taken, and I forgot to adjust my shadows 😭
I took several quick shots of the character in several states of undress. The purpose:
The left hand holding the cigarette needed to be visible to improve readability. This could only be done by removing the glove in a secondary screenshot.
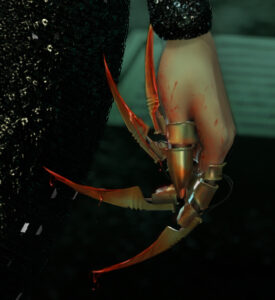
Remove the glove on the right hand and leave only the blades on the fingers – I’ve used these gloves fully in a previous image, and while I absolutely adore them, I wanted them to look more like jewellery.
Step 2.
To begin, I opened the screenshot I’d chosen as my base image within Photoshop and imported all the other necessary images into the file. I took some time to make sure they all lined up perfectly, then selected a layer mask for each to hide them.
On the mask layer, I painted in the areas I wanted revealing, i.e. the hands, cigarette, and bracelet. I also chose to mask some of the highlights on the face.

Step 3.
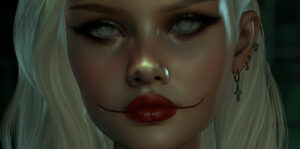
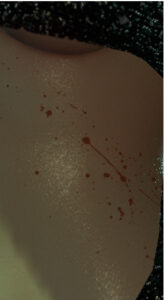
Next, I worked on digitally painting in detail on specific areas. A “Chelsea Smile” across the face, undead eyes, corrected the nose, smoke from the cigarette, unruly hair strands, splatters across the body and the blood dripping from the blades. For the splatters and smoke, I used a pre-made brush to reduce time, and used adjustment layers to make them fit more naturally.
Step 4.
As I’d unfortunately failed to adjust my shadows during the photoshoot, I now had to take the extra step to correct them. I used the Clone Stamp to duplicate some of the surrounding area, and for the more complicated sections, I chose to simply paint them.
Step 5.
For the final step, I used Camera Raw Filter. I went through each tab to balance the colour (I wanted a cold, uninviting tone to the room), and I increased the red tones (for the vibrancy of the nails, lips and blood and make them pop!). Added deep contrast, high exposure, a vignette to the edges, and, to finish the piece, a noise layer (to pull the whole picture together).
I then exported the file as a PNG to upload online.
until next time…